Added: 10.03.2014 23:26:29 Last updated: 19.04.2018 09:31:09
This guide explains how to set up the email client that comes with Android for sending and receiving email. For your information, in this guide we are using a Norwegian version.
NOTE: Manufacturers of Android-based devices often create their own look for icons, texts and descriptions, so they may differ from this guide. All of the technical information is the same.
To set up email in Android, you must use the values supplied below. Exchange the values with the values that apply to your email account with PRO ISP. In this example, we used ola@dittdomene.net as the email address with a specified password.
You should use cpanelX.proisp.no as the inbound and outbound mail server name, if you are using SSL. X must then be exchanged with the number of the PRO ISP server on which the email account is configured. If you do not use SSL, you can also use mail.dittdomene.net, where dittdomene.net must then be exchanged for the domain for which you wish to configure the email account in Android.
User name: ola@dittdomene.net Password: ********
Inbound mail server (without SSL): mail.dittdomene.net Outbound mail server SMTP (without SSL): mail.dittdomene.net
Inbound mail server (SSL): cpanelX.proisp.no Outbound mail server SMTP (SSL): cpanelX.proisp.no
Port for inbound mail server:
- POP without SSL: 110
- POP with SSL: 995
- IMAP without SSL: 143
- IMAP with SSL: 993 Port for outbound mail server SMTP without SSL: 26 Port for outbound mail server SMTP with SSL:465
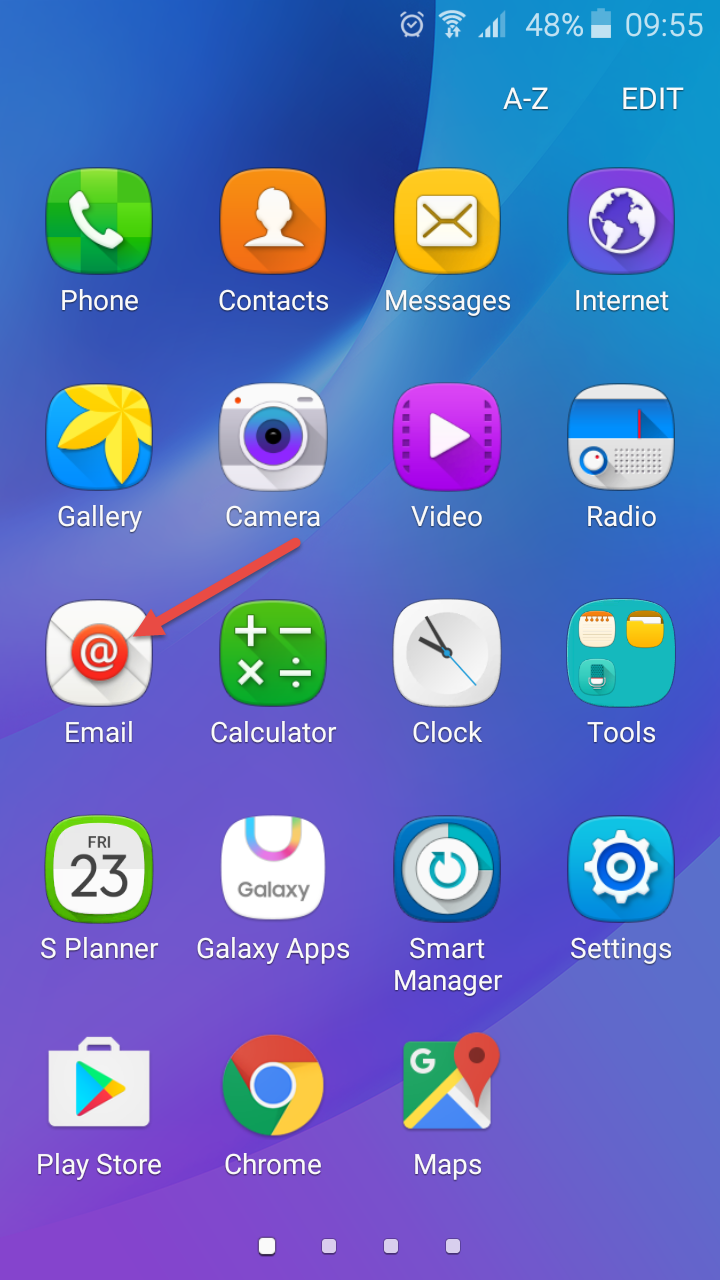
Steg 1 - Find the email app:
Open the list/overview of installed applications, and press "Email".
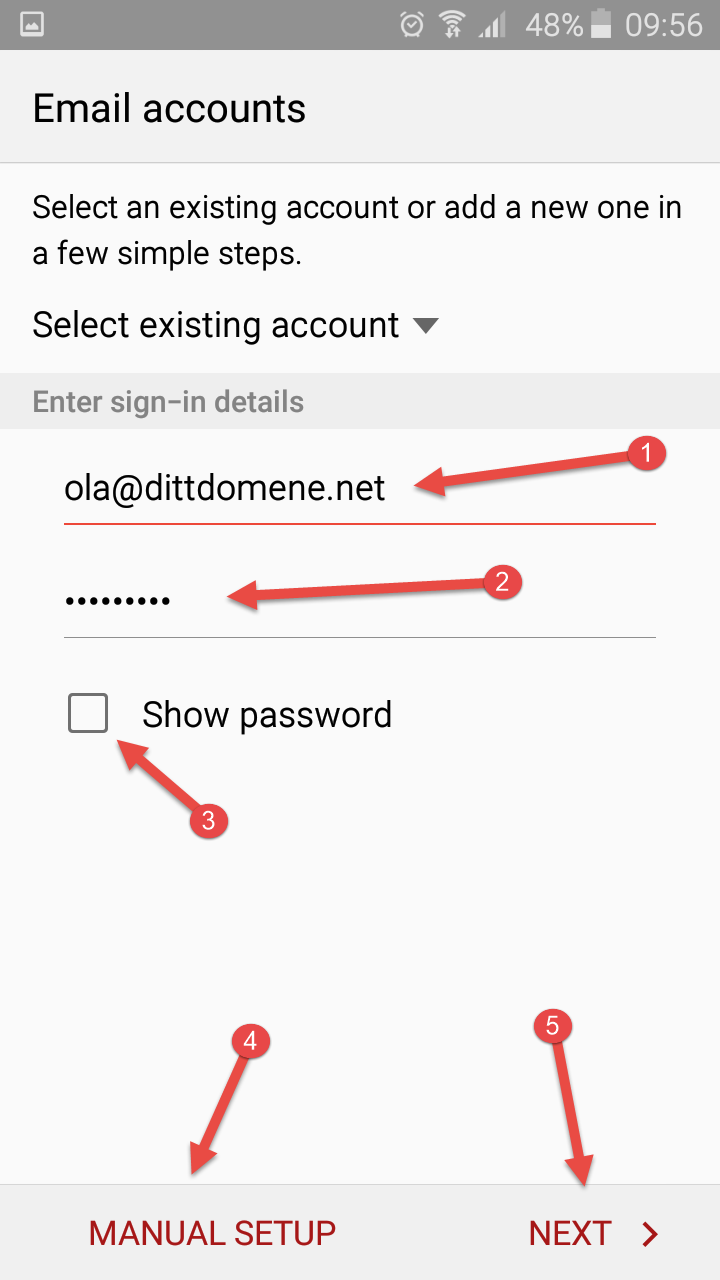
Step 2 - Add account:
Type in the email address that you wish to add.
Type in the password for the account.
To ensure that the password is correct, it may be a good idea to tick the "Show password" option.
In most cases, the phone will find which settings to use on its own, but if this does not work, select "Manual configuration" here. See "Step 4" for the details.
Click "Next".
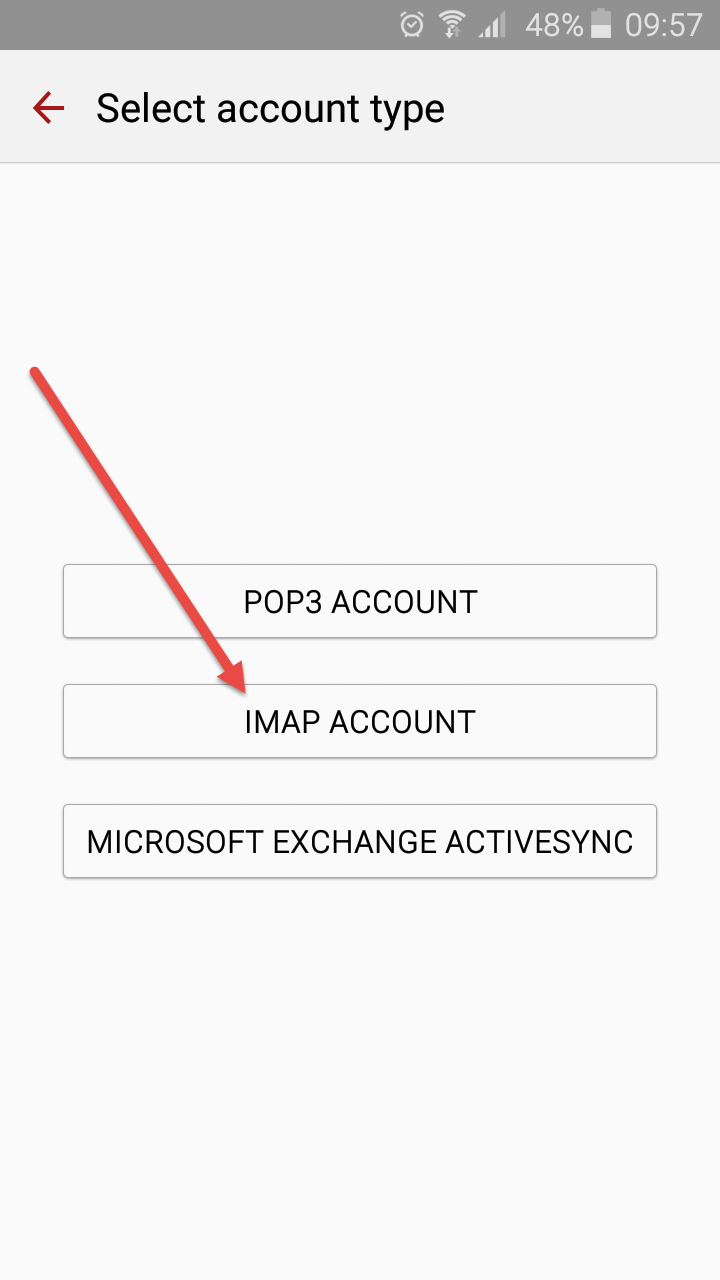
Steg 3 - Select account type:
We recommend using IMAP if you need to read the email on more than one device, which is why we used that in this example. Unless you have specific requirements, you should always choose "IMAP".
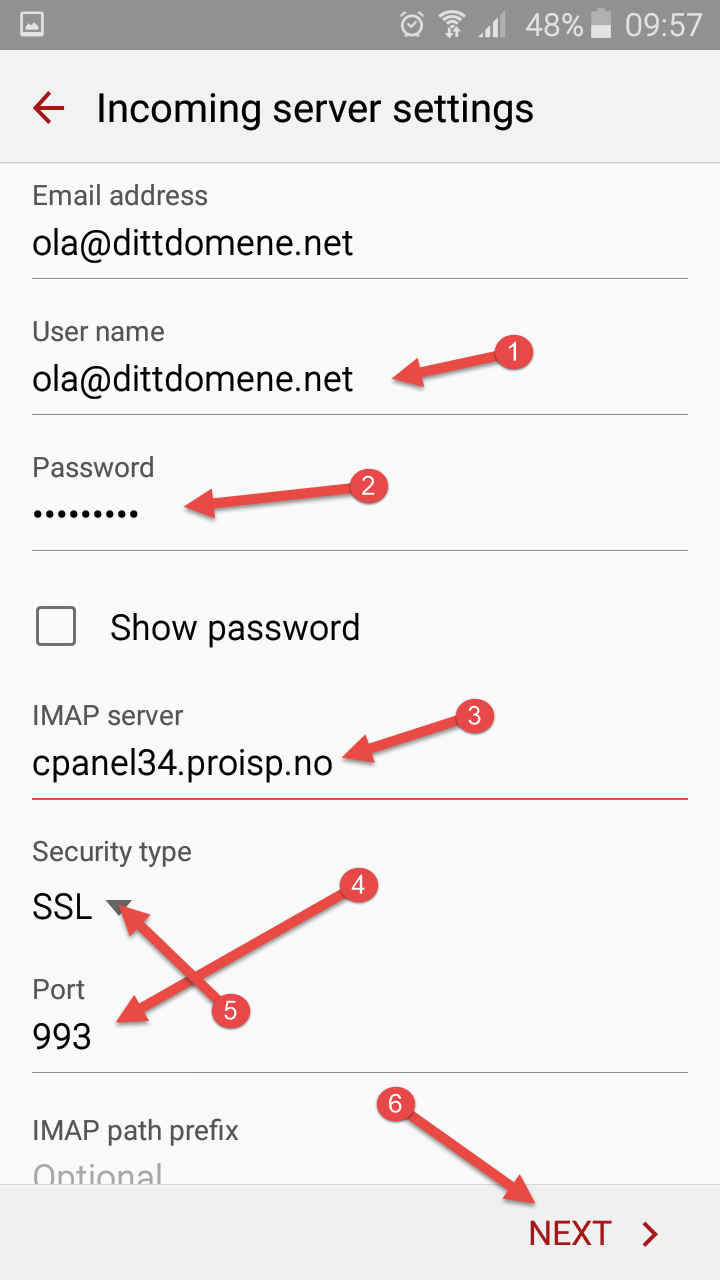
Step 4 - Mail servers (inbound and outbound server):
From "Step 2"; if the settings do not appear automatically, you must add them manually.
Type in the user name for the email account. This is always the full email address.
Type in the corresponding password.
Specify what server to use. In this example, "cpanel34.proisp.no" was used. You must exchange this with the information that applies to your account. You should have received this information when ordering your web hosting solution with us.
Specify which port to use. Look at the top of this guide to see what ports to use.
Select the type of encryption to use. We recommend always using SSL whenever possible.
Click "Next".
Add information about outbound mail server.
Specify the outbound server address. In our example, we have used "cpanel34.proisp.no", you must replace this with the information which applies to your account. You should have received this information when ordering your web hosting solution from us.
Specify the port number for outbound mail. Look at the top of this guide to see what ports to use.
Select the type of encryption to use. We recommend always using SSL whenever possible.
Tick the option indicating that the outbound server requires authentication.
Type in the user name to use. This is always the same as for the inbound, and it is always the full email address.
Type in the corresponsing password.
Click "Next".
Step 5:
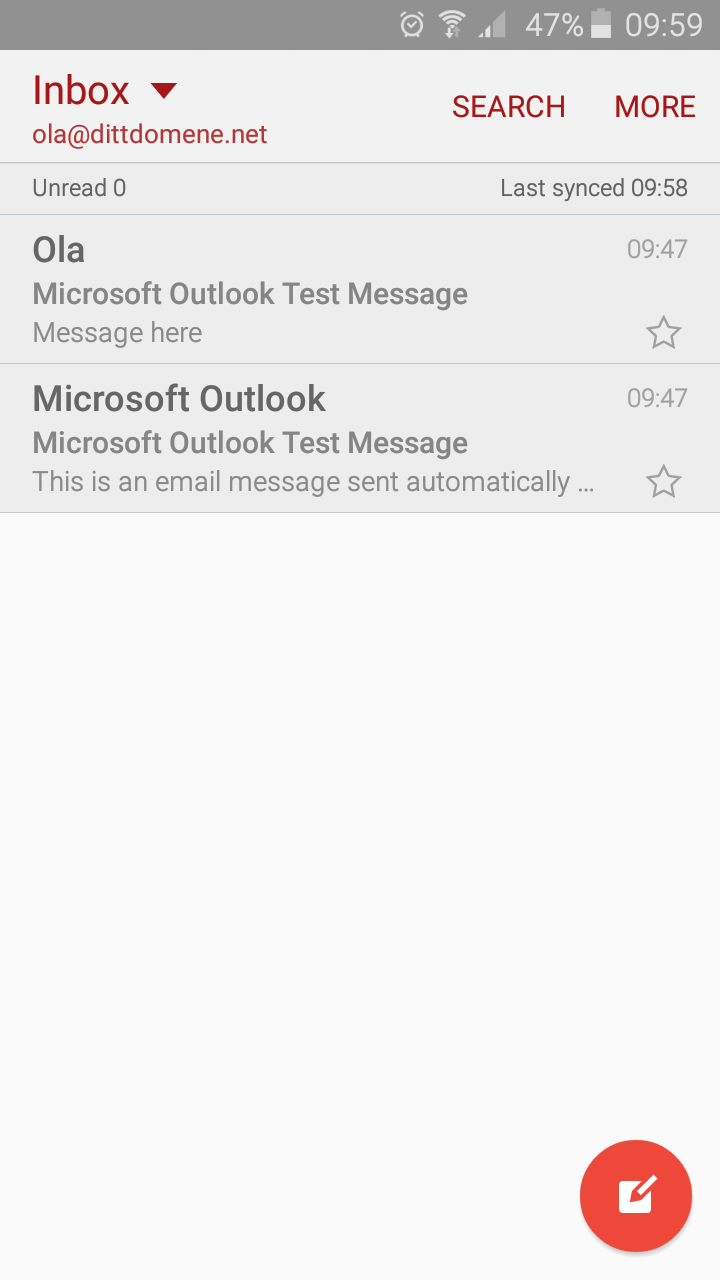
Now you should be able to read and access your mailbox.
Done
We have now been through the steps required to set up your email account in Android.