None found
Your search returned no hits.
95% of all problems already have a solution in our knowledgebase

Added: 12.10.2015 15:47:55 Last updated: 19.02.2019 16:53:54
If Outlook is updated to latest version you will be using Microsoft Outlook Office 365 version. See guide for set up here.
This guide explains how to create an email account in Microsoft Outlook 2013 or Microsoft Outlook 2016. We assume that you have installed Microsoft Outlook 2013 or Microsoft Outlook 2016 on your PC and that you have not set up any email accounts previously.
We recommend that the email account be set up using IMAP instead of POP3, so that the emails will remain on our server instead of being deleted when they are downloaded. For this reason, this guide will show how to create the email account using IMAP.
To set up email in Outlook 2013/Outlook 2016, you must use the values supplied below. Exchange these values with the values valid for your email account with PRO ISP. In this example, we used ola@dittdomene.net as the email address with a specified password.
For the inbound and outbound email server, you should use cpanelX.proisp.no as the server name if you are using SSL (recommended). The X should then be exchanged for the number of the PRO ISP server on which the email account is configured. If you do not use SSL, you can also use mail.dittdomene.net, where dittdomene.net must then be exchanged for the domain for which you wish to configure the email account in Outlook 2013/Outlook 2016.
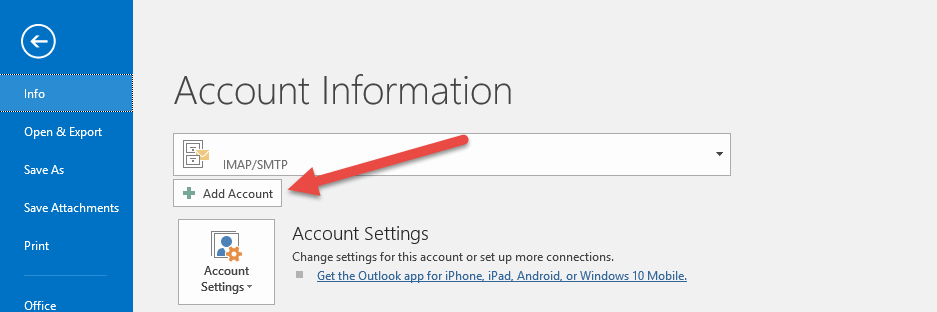
Step 1:
Select "File" as shown in the image below.

Steg 2:
Select "Add account"
Step 3:

Step 4:
Outlook will attempt to find the correct configuration for the account based on the address, user name and password. To do this, Outlook must be granted the permission to do so; this is done as shown below.
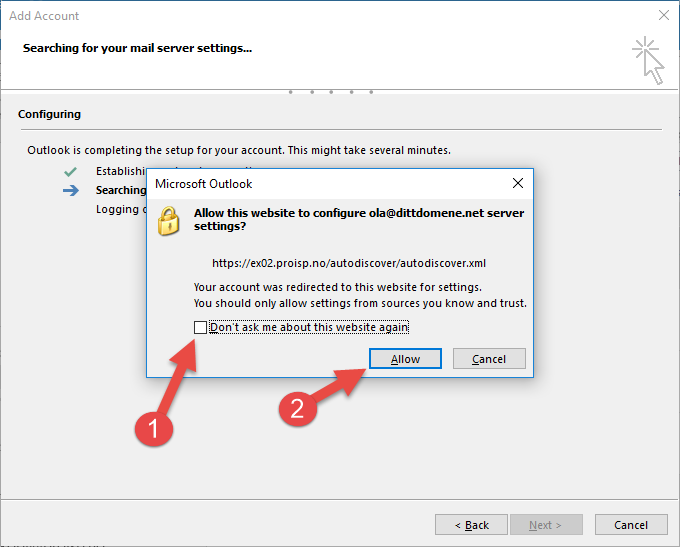
Step 5:
Step 6:
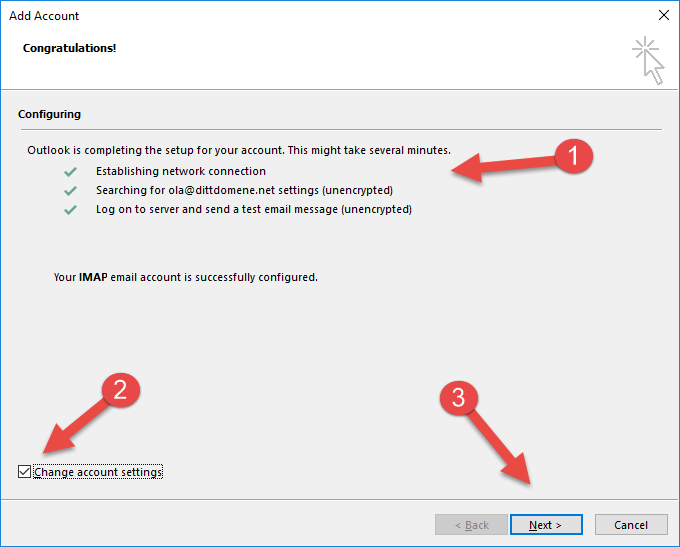
If Outlook is not able to find the correct settings automatically, you must specify them. We assume that you have ticked the selection from step 2 and step 5 and pressed "Next".

Step 7:

Step 8:
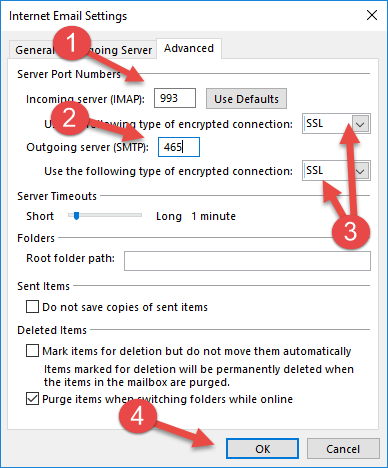
Step 9:

Step 10:
The account is now ready for use, and there should be one or more test emails in the inbox sent by Outlook.
