Added: 10.03.2014 23:26:29 Last updated: 19.04.2018 09:26:48
This guide explains how to set up the email client that comes with Windows 8/8.1 for sending and receiving email.
To set this up, you must use the values supplied below. It is important that you exchange these values with the values that apply to you and your email account.
You should use «cpanelX.proisp.no» as the inbound and outbound server, exchanging the X with the number of the server on which the email is configured. If you do not use SSL, you can also use mail.dittdomene.net, where yourdomain.net must then be exchanged for the domain for which you wish to configure the email account in Windows Mail.
For your information, Windows 8 Mail does not support POP in its default configuration.
User name: ola@ydittdomene.net Password: ********
Inbound mail server (without SSL): mail.dittdomene.net Outbound mail server SMTP (without SSL): mail.dittdomene.net
Inbound mail server (SSL): cpanelX.proisp.no Outbound mail server SMTP (SSL): cpanelX.proisp.no
Port for inbound mail server:
- POP without SSL: 110
- POP with SSL: 995
- IMAP without SSL: 143
- IMAP with SSL: 993 Port for outbound mail server SMTP without SSL: 26 Port for outbound mail server SMTP with SSL: 465
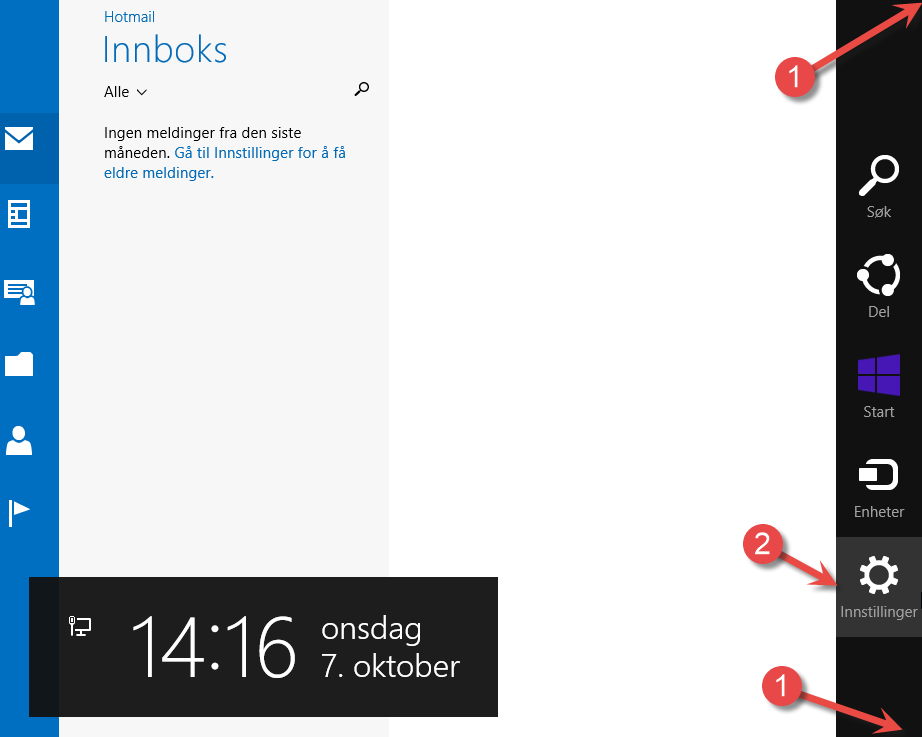
Step 1:
Begin by opening the email application "Emailt", as shown in the image below.
Step 2:
Move the mouse cursor to one of the corners in order to open the "charms" menu. This can also be opened by pressing the "Windows key + c" on the keyboard.
Select "Settings".
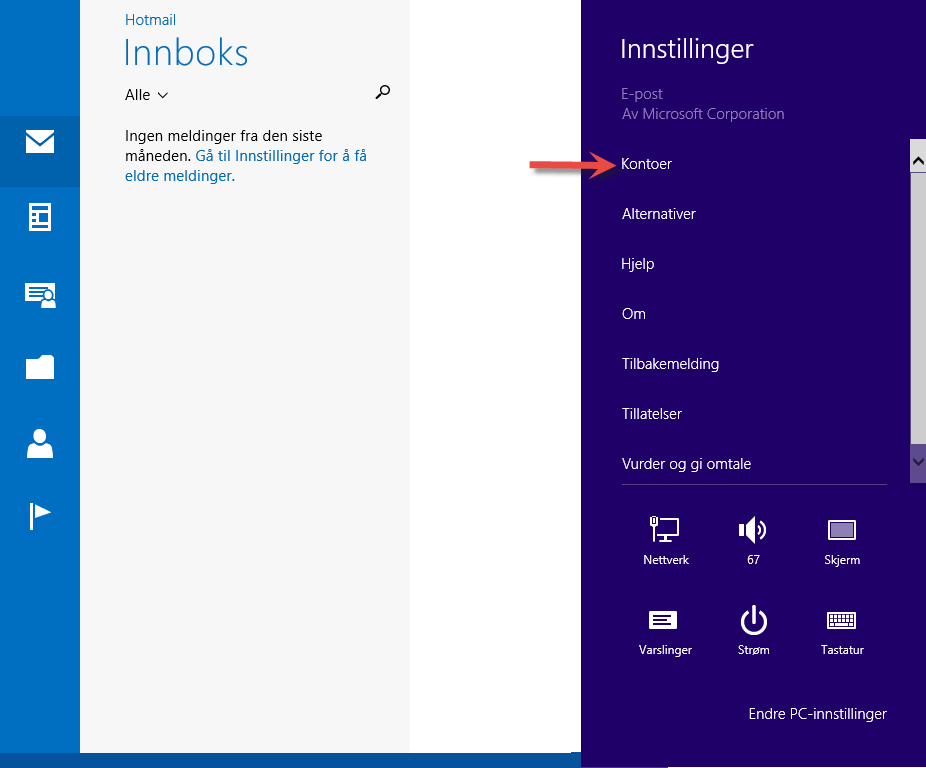
Step 3:
Select "Accounts".
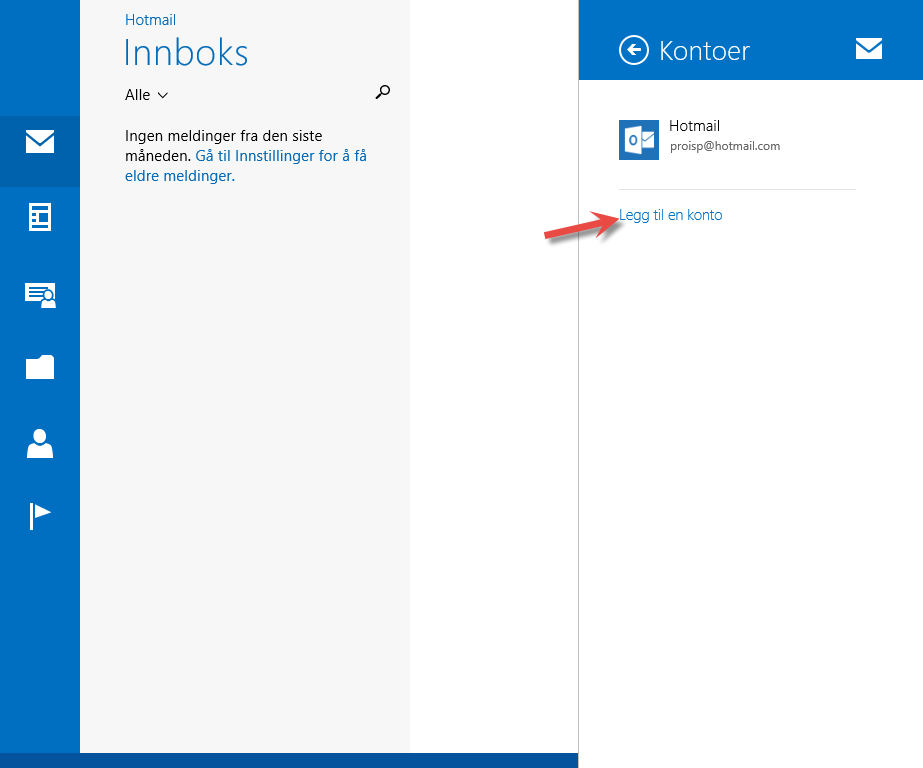
Step 4:
Select "Add an account".
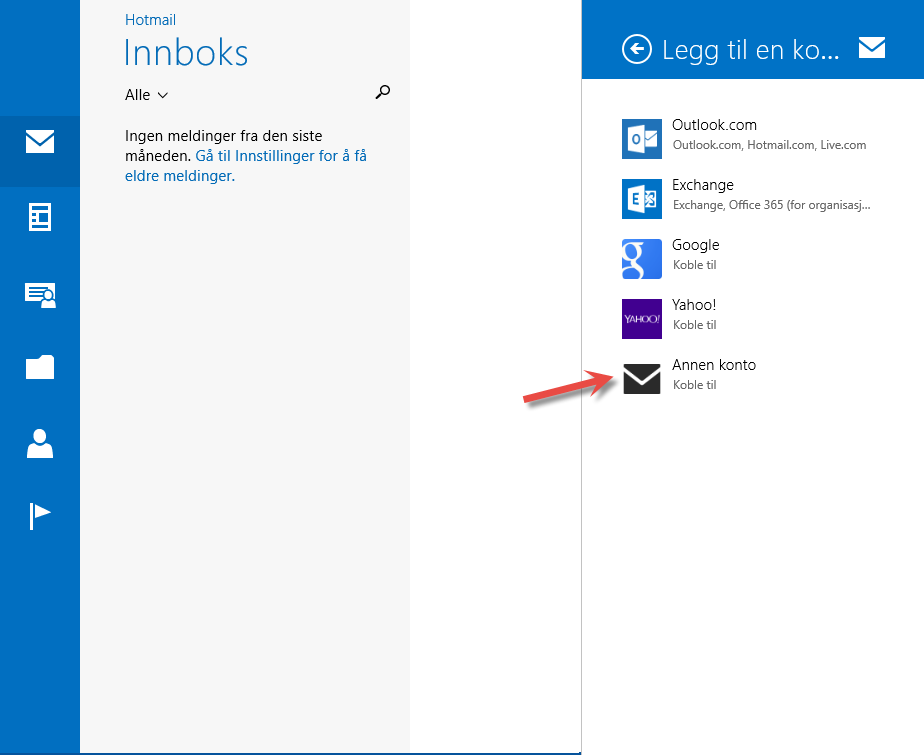
Step 5:
Select "Other account".
Step 6:
Tick the option to set up an "IMAP" account.
Click "Activate".
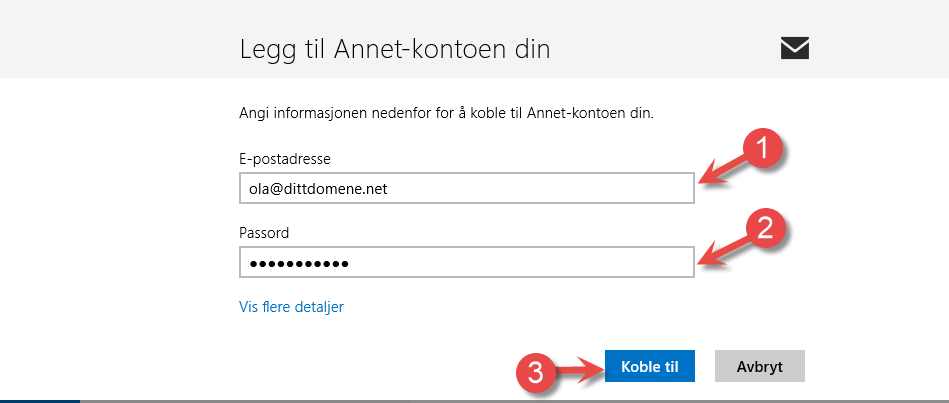
Step 7:
Type in the email address you wish to add.
Type in the corresponding password for the account.
Click "Activate".
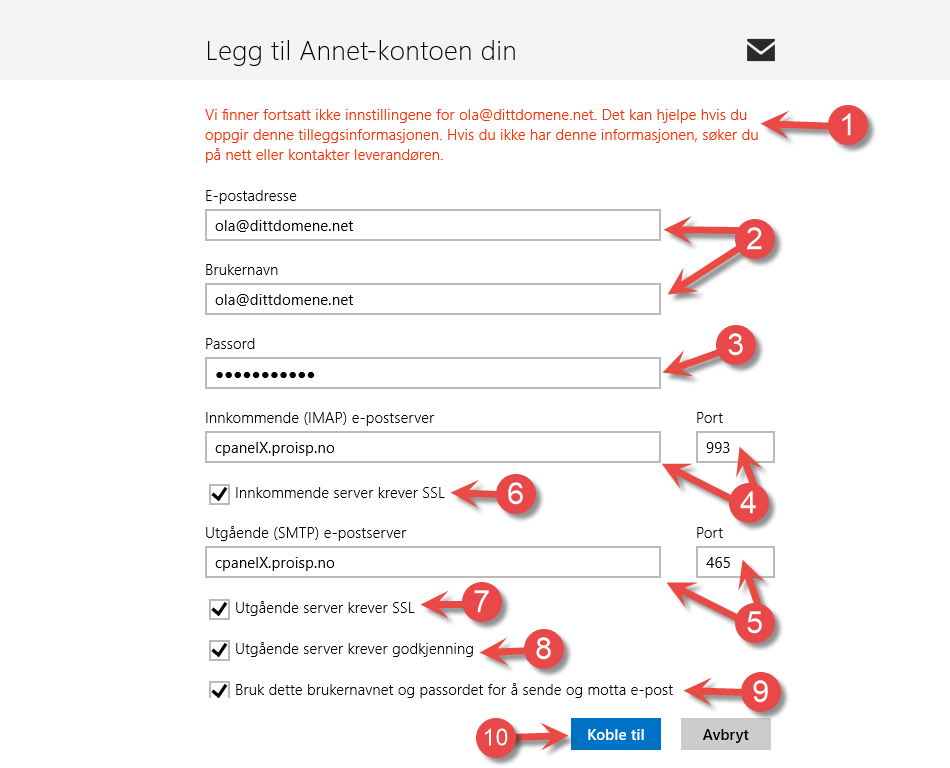
Step 8:
Windows Mail will attempt to find the correct configuration for the account based on the information given in "Step 7". If this does not work, you will receive the below warning, and you will have to fill in the detailed information.
Type in the email address and the user name. In our web hosting solutions, these are always identical.
Type in the password for the account.
Fill in the inbound server and port number. Yoy received the information about the address when your ordered your web hosting solution from us. Look at the top of this guide for details on which port number to use.
Fill in the outbound server and port number. Yoy received the information about the address when your ordered your web hosting solution from us. Look at the top of this guide for details on which port number to use.
Tick the option "Inbound server requires SSL". We recommend using SSL if possible.
Tick the option "Outbound server requires SSL".
Tick the option "Outbound server requires authentication".
Tick the option for the same user name and password being used for both outbound and inbound server.
Click "Activate".
Step 9:
The account has now been added, and you can send and receive email from this application. If you would like to change the settings for how much email to synchronize or make changes to the settings for port number, server addresses etc., click as shown in the image below.
Done
We have now been through the steps for setting up your email account in Windows 8/8.1 Mail.